measurement solution FOR
CATHODE COATING
Tandem coating lines


Receive a baseline laboratory measurement report for your product

Learn more about
our technology

Contact our sales team
MEASUREMENT SYSTEM
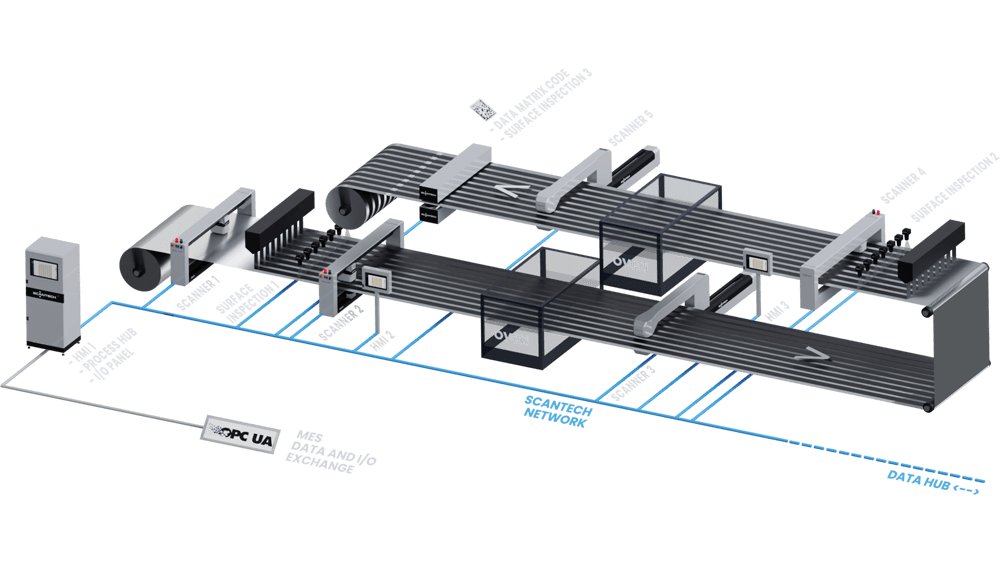
5 SCANNERS USING
OUR ADVANCED SAMESPOT TECHNOLOGY
- Scanner 1 for the foil substrate
- Scanner 2 and 4 for each wet coating section
- Scanner 3 and 5 for each dry coating section
3 VISUAL INSPECTION STATIONS
- Surface inspection systems 1 and 2 for each wet coating section
- Surface inspection system 3 before the winder
HMIs
3 SUPERVISION STATIONS WITH THE FLEXSCAN INTERFACE
- 2 HMIs dedicated to the coating stations
- 1 full-line HMI inside the control room
- OPC-UA connection with the SCANTECH network
FEATURES

RECOMMENDED SCANNERS
SCANNERS: 1, 2 & 4
- Type: O-Frame
- Up to 1500mm for anodes and cathodes
SCANNERS: 3 & 5
- Type : C-Frame if thickness is required
O-Frame if thickness is not required
MEASUREMENTS
THICKNESS MEASUREMENT
- Technology: X-RAY transmission sensor
- Product range: 1 to 100μm
- Accuracy: Better than 0.1%
WET OR DRY COATING BASIS WEIGHT MEASUREMENT
- Technology: autocalibrated transmission sensor
- Product range: 1 to 500g/m2
- High edge detection resolution
- Repeatability: Better than 0.1%
- Autocalibration: ± 1% of absolute value
- “Bunny ears“ profile visualization
ADDITIONAL
DRY THICKNESS MEASUREMENT
- Technology: optical sensor
- Product range: 1 to 3000μm
- Accuracy: ± 1μm
OPTIONAL
DENSITY MEASUREMENT
-
Technology: optical sensor + autocalibrated transmission sensor
VISUAL INSPECTION
DEFECT DETECTION
- CD resolution: <100μm
- MD resolution: <100μm
- Defect classification
GEOMETRY MEASUREMENT
- Geometric figure control, including double-sided overlapping patterns and ceramic coating
- Patterns and stripes
- Accuracy: Better than 0.1μm
TRACEABILITY
- Data Matrix Code (DMC) interpretation

Receive a baseline laboratory measurement report for your product

Learn more about
our technology

Contact our sales team
COMPACT DESIGN
LV3 SCANNER
RECOMMENDED SCANNER


COMPACT DESIGN
HC3 SCANNER
RECOMMENDED SCANNER


Graphical representation of both substrate and coating lanes.
Interactive profiles and trends of single and multi-strip production.

SYNCHRONIZED SCANNERS
Advanced Same Spot Measurement ensures accurate net coat-weight calculations by ensuring that the substrate and coat scanners traverse precisely the same trajectory on the web, even as line speed varies.
This synchronization eliminates sensitivity to point-to-point variations and formation in the substrate material.

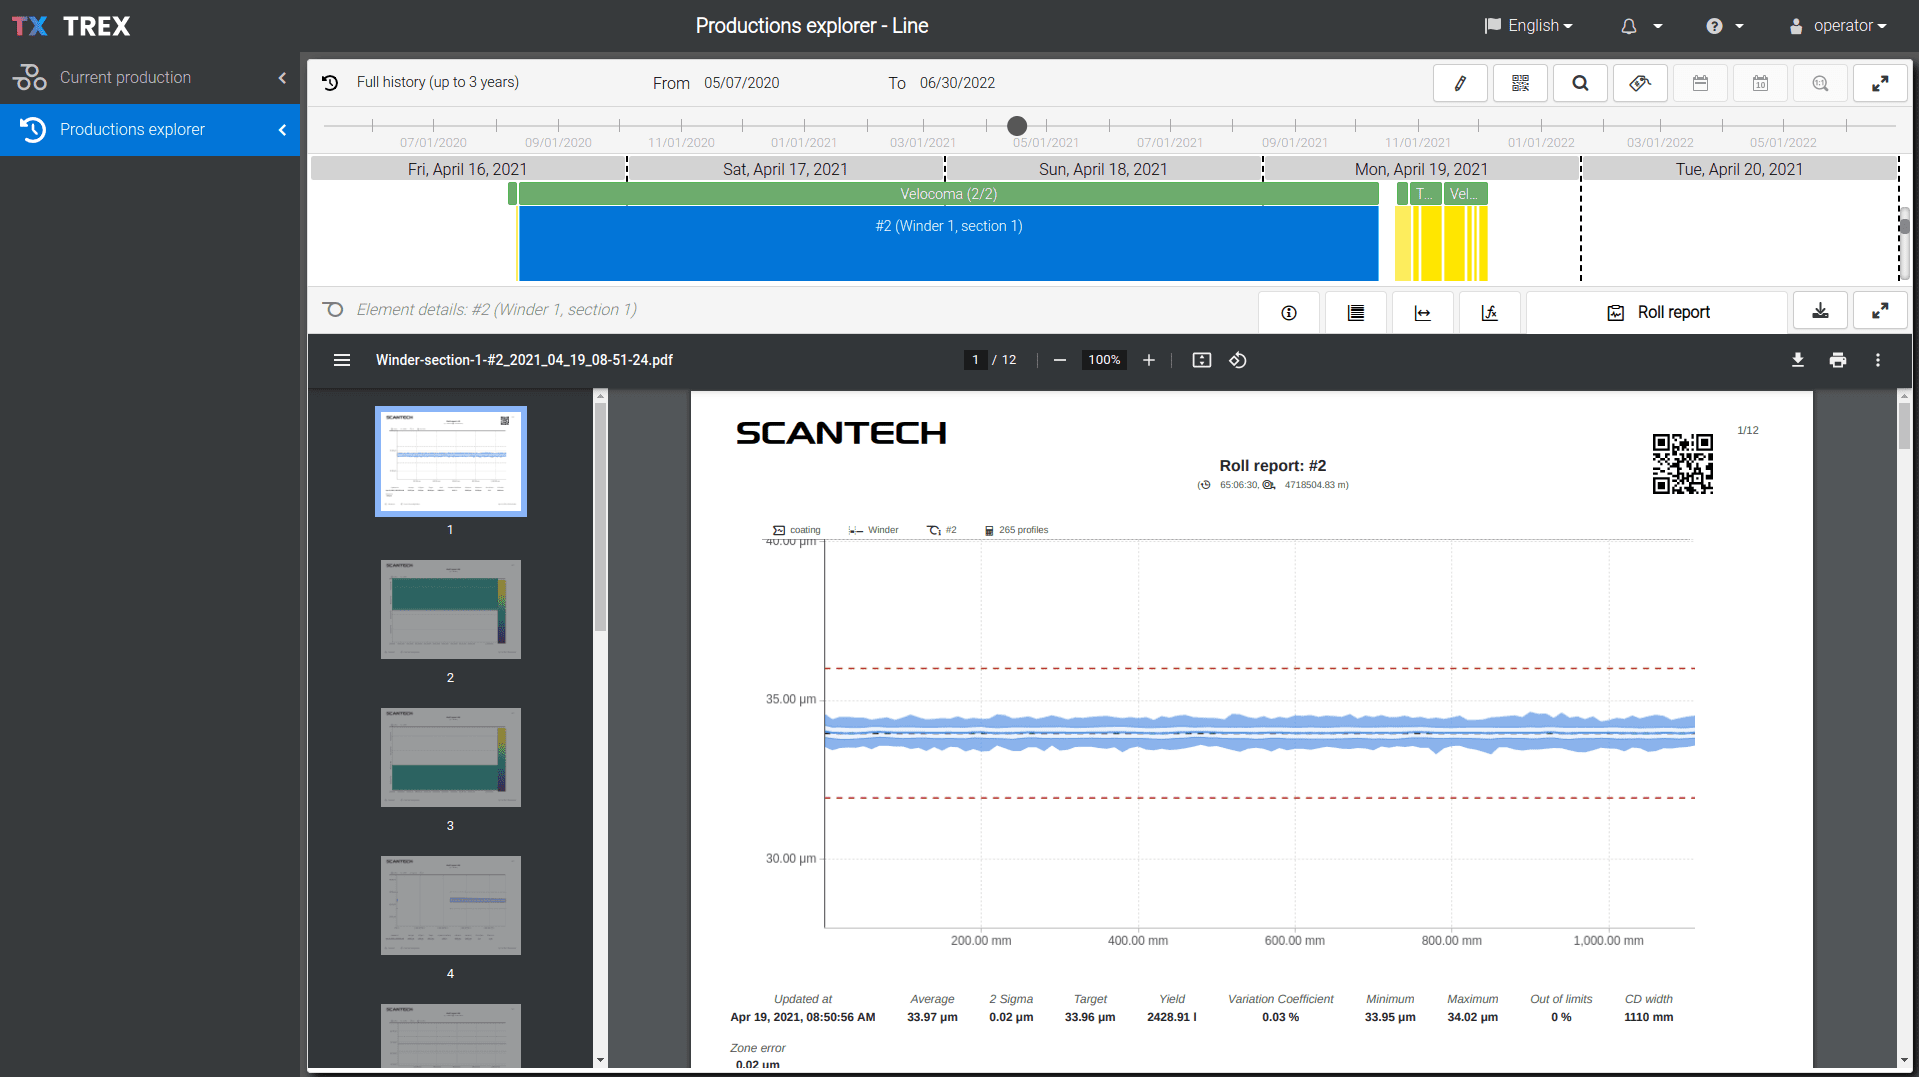
The TREX application is dedicated to browsing past and current production reports. Our unique tagging system allows archived reports to be retrieved, sorted, categorized, and collated.
Gather all the reports for a given customer during the last few years, or find all the reports for productions that use a given recipe.
Customize tags to fit your needs and the possibilities are virtually infinite!


Receive a baseline laboratory measurement report for your product

Learn more about
our technology
